- Track your orders
- Save your details for express checkout
- Join our loyalty points scheme and receive points and future discounts with every purchase
When it comes to optimising outdoor spaces, wind break mesh is an invaluable tool. Whether you're designing a lifestyle block, garden, or a commercial outdoor area, this mesh can significantly enhance the comfort and usability of your space. But like any installation project, there are essential points to keep in mind when installing wind break mesh. In this blog, we'll delve into the benefits of wind break mesh and explore key considerations during the installation process.
Understanding Wind Break Mesh
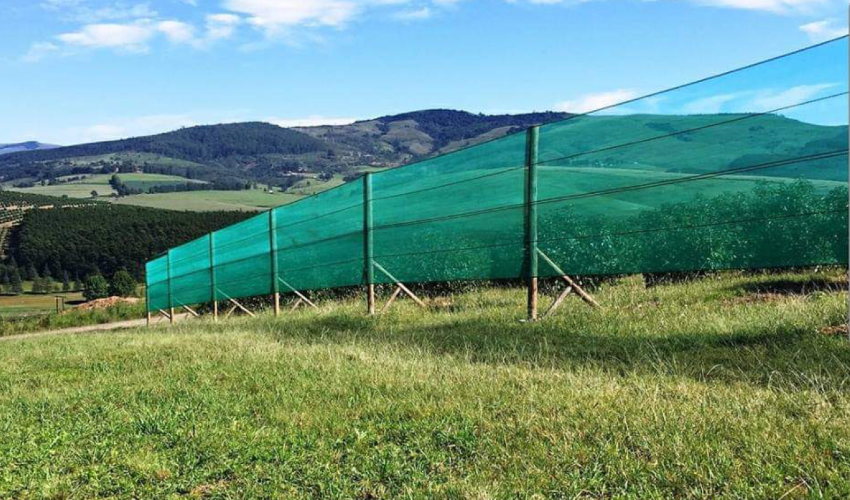
Wind break mesh, also known as windbreak netting or wind mesh, is a versatile and cost-effective solution for reducing wind exposure and enhancing the comfort of outdoor spaces. It's commonly used in various settings, including gardens and lifestyle blocks, outdoor dining areas, and construction sites.
Wind break mesh is typically made of durable materials such as HDPE (high-density polyethylene) or PVC (polyvinyl chloride). It's designed to provide protection from wind while allowing sunlight and air to pass through. The primary functions of wind break mesh include:
1. Wind Protection: Wind break mesh serves as a barrier against strong winds, helping to create a more enjoyable and sheltered environment. It can significantly reduce wind speeds, making outdoor spaces more comfortable for activities and gatherings.
2. Shade and Privacy: In addition to wind protection, wind break mesh can provide some privacy but do note that for a full privacy, a privacy fabric is recommended. It can also act as a shade cloth, helping to block excessive sunlight and create a more intimate atmosphere.
3. Crop Protection: In agricultural settings, wind break mesh is used to protect crops from strong winds, preventing damage and promoting healthy growth.
 |
How to install your Windbreak
1. Assess Your Site
Before you start installing wind break mesh, it's crucial to assess your site thoroughly. Consider the following factors:
Wind Direction: Determine the prevailing wind direction in your area. This will help you identify the optimal locations for installing wind break mesh.
Purpose: Define the specific goals of your wind break mesh installation. Is it primarily for wind protection, shade, privacy, or a combination of these factors?
Site Conditions: Analyse the terrain and ground conditions of your site. Soft soil might require additional anchoring methods to secure the mesh.
2. Choose the Right Mesh Type
Select the appropriate wind break mesh based on your requirements. Mesh comes in various densities and colors, allowing you to tailor the installation to your specific needs. Consider the following factors when choosing a mesh type:
Density: A denser mesh provides better wind protection, while a more open mesh allows more air and light to pass through. You can either go for the Heavy Duty Windbreak where it is used in more demanding applications including boundary fencing, internal and external fencing and site fencing. Where a more robust windbreak is called for with a wind porosity of 45-55% and with a lifespan of 10 years plus, this would be the best option. Where you protecting new plantings from damage by desiccating winds, a standard Windbreak Cloth would be suitable. Always check that the windbreak has eyelets on the edges to ensure easy installation.
Colour: Some meshes are available in different colors, which can affect the amount of shade and privacy provided. Darker colours tend to block more light. Green & Black tend to be the most common colours offered.
3. Proper Anchoring and Support
Wind break mesh should be properly anchored and supported to withstand wind pressure. Depending on your site and the chosen mesh, you may need to install posts or frames. Here are some key points to consider:
Posts: Use sturdy, weather-resistant posts for support. These should be anchored securely into the ground. We recommend the use of Nail Plates to secure the Windbreak Fabric to timber. Simply tighten fabric to required tension then place nail plate through fabric and hammer gently into timber to secure fabric placement. When putting Windbreak along a fence, we recommend using the Butterfly Clips about 500mm apart or in higher wind areas, 300mm apart.
Tensioning: Ensure the mesh is properly tensioned to prevent sagging.
4. Maintenance and Replacement
Regular maintenance is essential to keep your wind break mesh in optimal condition. Over time, exposure to the elements can cause wear and tear. Make sure to:
Inspect the mesh for any signs of damage or deterioration and address issues promptly.
Clean the mesh to remove dirt, debris, and mold to maintain its appearance and functionality.
In conclusion, wind break mesh is a valuable addition to outdoor spaces. By carefully considering your site's specific needs, choosing the right mesh type, and installing it correctly, you can create a more comfortable and inviting outdoor environment. Regular maintenance when necessary will ensure your wind break mesh continues to serve its purpose effectively. Whether you're a homeowner, business owner, or farmer, wind break mesh can be a game-changer for your outdoor spaces.